You have reached the right destination if you have any queries regarding How To Use iPad as HDMI Monitor. This detailed guide will equip you with all the information you need.
Wondering what the perfect how to use iPad as monitor HDMI trick is? Your hunt for answers stops now, we got you! The following article details all you need to know about HDMI input to HDMI in multiple ways with detailed explanations. Without further ado, let us dive into it.
Let us briefly discuss HDMI input to iPad and what it means. You can connect other devices to your iPad through our given iPad to HDMI processes in order to use it as a monitor. You can even use it to play games, something that I love to do myself!
There are various ways that you can get HDMI input to iPad, the most common ones include using HDMI wireless transmitter devices, connecting through third-party apps or the Apple digital AV adaptor and even by Airplay and an Apple TV device if you want to go the other way around. There are certain tricks to using HDMI in the iPad for Xbox and PlayStations.
I have discussed all these iPad to HDMI ways in detail below so you can have a comprehensive understanding of the iPad to HDMI connection so you can use it to the fullest!
Recommended Reading – Ring Motion Warning: What It Is For, and Is It Safe?
Using HDMI Wireless Transmitter
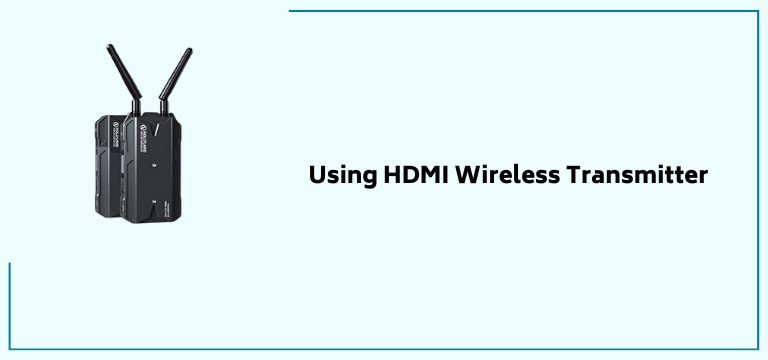
This is the most basic and common way of going about the HDMI in iPad route, which I have tried and found pleasant results with. As you would have noticed, there is no HDMI input on the iPad when brought, meaning that technically there is no HDMI input on the device, despite having a working adaptor.
The good news is that we can make it happen through one simple device, i.e., the wireless transmitter. You can use it to connect your iPad to a PC or a console and take full advantage of it!
I have shared a HDMI wireless transmitter that has worked for me below, but you can find one that works best for you. Once you have this transmitter with you, just pair it with your iPad and connect the cable to the transmitter. Just that easily, you will now be able to use your iPad as a monitor by connecting it to compatible devices.
As I mentioned above, there are many HDMI wireless video transmitters that you come across in the market. I was recommended the Hoyland Mas X 1080p one and it worked amazingly for me. Let me break it down so you can decide for yourself if it is a good match for your iPad to HDMI needs.
First of all, it was incredibly easy for me to connect to my iPad and even into my gaming console which is the PS5. I’ve read that it works seamlessly with Xbox Ones too. That being said, let us move on to the more technical perks of this transmitter, the first one being its 0.07 latency.
In layman’s terms, it has almost no lag, making it an excellent choice as a monitor. I was playing one of my favorite races there, and the lag seemed unnoticeable. Another added plus is the perfect audio and video sync that it provides, and it can also tell you id your iPad is charging or not. We should also talk about the range of this transmitter, which is three hundred feet. It is more than enough for personal use.
Now that we discussed it feel free to try this device or get another one that seems to work. Moving on to how to use it to establish the iPad to HDMI connection. Once you have the transmitter, locate and press the power button to turn it on.
Once on, it will make a Wifi network, and you will be required to connect your iPad to a wireless network as well. Next, get an HDMI cable and then carefully connect it to the full-sized HDMI port that you will easily find on the transmitter. This finishes the hardware component of the process.
Next, look up and download the HollyView app on your iPad. Open it up and give it a minute or two for it to connect to the Wifi created by your transmitter. The last step to this super simple process is to select the Connect button, and just like that, you will now be able to use it as a monitor!
Here is a quick tip to keep in mind while using these wireless transmitters, the battery generally tends to die out in about an hour. In case you plan on using it for more than that, make sure that you leave your HDMI monitor connected through a C-type cable or a USB.
This brings us to the end of our how to use iPad as monitor HDMI for your TV guide! Let us move on to doing the same for PlayStation and Xbox!
In Case of a PS4: Remote Play
Using the PS4 Remote Play allows you to use your iPad as a monitor for your games or just a bigger screen if you are generally just using your apps. The process to make this HDMI input to iPad connection is really simple and I’ve explained each step in detail below:
- Go to the App Store and search PS4 Remote Play. Find the authentic one and download it.
- Use an Ethernet cable to connect your PS4 to your home network.
- Once the app is downloaded, open it and sign in with your PlayStation account details.
- Easy-to-follow instructions will be provided on the screen to finish the setup.
Once you are done, you will be easily able to use iPad as HDMI monitor for your PS4 or watch Netflix or anything else you wish to!
In case of Xbox
You can create a similar wireless iPad HDMI input connection with your Xbox. You will need the following: an iPad that allows wireless connections like this one and an Xbox console that is connected to a stable internet connection.
Let’s take a look at how you can wirelessly connect both these devices to establish HDMI in iPad:
- On the Xbox console, go to Settings and then to Preferences.
- Move on to Game DVR & Streaming.
- Then select the Allow game streaming to other devices option.
- Open your iPad and further open the Xbox App.
- Go to Connections and then choose the Xbox console, make sure it is the one you want to connect to.
- Let the connection be established and then enjoy and use iPad as an HDMI monitor as you play games!
Let us turn things around and see how to establish an HDMI in iPad connection that allows the iPad screen to be displayed on other devices!
Recommended Reading – Blink Camera Blinking Red: Fix With This Simple Hack
Using Apple Digital AV Adapter

If you want to use this HDMI in iPad way, this is what you are going to need: a retina display with your iPad or a lightning digital AV adaptor or lightning to 30-pin-Adaptor in case of an older iPad and a good condition HDMI cable.
Once you have acquired these things, use the following guide to make the iPad to HDMI connection:
- First, connect the adapter to your iPad.
- Then, proceed to connect the HDMI cable to your adapter as well.
- Take the other end of your HDMI cable and join it to your TV.
- Go to your TV settings and choose the correct input.
- You will see that your iPad’s display will now be visible on your TV screen.
You can follow the same process in the case of projectors as well. This trick is usually extremely helpful in cases of presentations and the extra big monitor comes in handy.
Another thing to keep in mind is that this adapter will charge your iPad while being connected! So that is an added plus!
Recommended Reading – How to Turn On a Vizio TV Without The Remote: FIXED
Using AirPlay and Apple TV
Another way to do the iPad to HDMI connection is through Airplay if you have an Apple TV. This feature allows your TV to display screens of other devices and it does not even need a physical connection.
Here is what you will need: An Apple TV, it’ll work for ones that are second generation or later versions and a compatible HDMI cable.
Let’s take a look at how you can make this iPad to HDMI connection:
- You will first need to ensure that both your devices i.e. your Apple TV and iPad are connected to the same Wifi source, it could be your house network.
- From the bottom of the iPad screen, swipe up. This is going to open the Control Center.
- Locate and tap on the Airplay icon.
- Choose the name of your Apple TV.
- And that’s it, it is just as easy as making a Bluetooth connection. You will notice that the display of your iPad is now on your TV screen.
And just like that, in five minutes, your
Recommended Reading – How to Reset Hisense TV: Step-by-Step Guide for
Using Third-Party Apps

There are many apps available in the market that claim to help to put your iPad’s display on your TV screen or other devices. Yes, even the ones that do not have the Airplay option.
Here are the things you are going to need in order to make this iPad HDMI input connection: a streaming device that is compatible, like a Fire TV Stick or Roku along with a good condition compatible HDMI cable.
Let’s see a step-by-step guide on establishing this iPad to HDMI connection:
- Choose and download the streaming app on your iPad, all of them basically function in the same way.
- Connect your streaming device to your TV or any other display forms.
- You will find the instructions on the app itself on how to connect your iPad next, at the end of which you will notice that your screen will be displayed on the device of your choice.
Recommended Reading – Ecobee Calibrating Heat Cool Disabled: Fix in Seconds
Wrapping Up
This wraps up my use iPad as HDMI monitor guide. I have personally used these tricks to connect my iPad to my TV as well as my PlayStation and it has worked seamlessly every time.
These tricks really make it easier to have an additional bigger or smaller monitor according to need which is really convenient. Try these tricks out for yourself today and make the best of both worlds!
Table of Contents