You have reached the right destination if you have any queries regarding How to Change Inputs on Roku TV. This detailed guide will equip you with all the information you need.
Changing the input on your Roku TV allows you to use your device multi-faceted. In order to take full use and advantage of your device, we have covered how to change input on Roku TV in detail.
Wondering how to switch up your Roku TV input? The standard way to do so would be through the Settings option, where you can set up the inputs on your screen. You can get your Roku TV inputs with or without the remote; both have been explained in depth below, along with setting up your default Roku TV input setting.
But before we can get to that, many questions exist. What are the various Roku TV inputs? How to change input on Roku TV or even find out what you are using? Do not worry; we have covered it all.
Continue reading to grasp how to change input on Roku TV from scratch.
Recommended Reading – How to Clear Cache on Roku: Fix in Seconds
Roku TV Input: Meaning and Types

Before we can get to answering big questions like how can one change input on Roku TV, let’s answer the fundamental questions in order to get a better understanding of the topic.
Your Roku TV input refers to a particular connection or source which provides or acts like a source for displaying or accessing content on a device’s screen. Different inputs allow you to access a variety of media sources.
Let’s move on to Roku TV inputs now. Your Roku TV generally comes equipped with three inputs. These are:
- HDMI input: This is the most widely used Roku TV input. It allows you to connect to your satellite and cable TV receivers.
- AV IN: This particular Roku TV input allows for connection with cable TV boxes.
- Cable and Antenna Input: As the name suggests itself, it allows you to connect to the antenna through a coaxial port.
You can set your device up according to your choice and even switch up the Roku TV inputs according to need. A similar step should be followed of your Roku remote flashing green light. Continue reading to find out how to change inputs on Roku TV on your own.
Recommended Reading – Apple TV No Sound: Fix in Seconds
How to Switch Input on Roku TV: Live TV
This section tells you the most basic way to set up Roku TV input as Live TV. This is how you can do it yourself:
1. Switch on your TV and go to the Home screen.
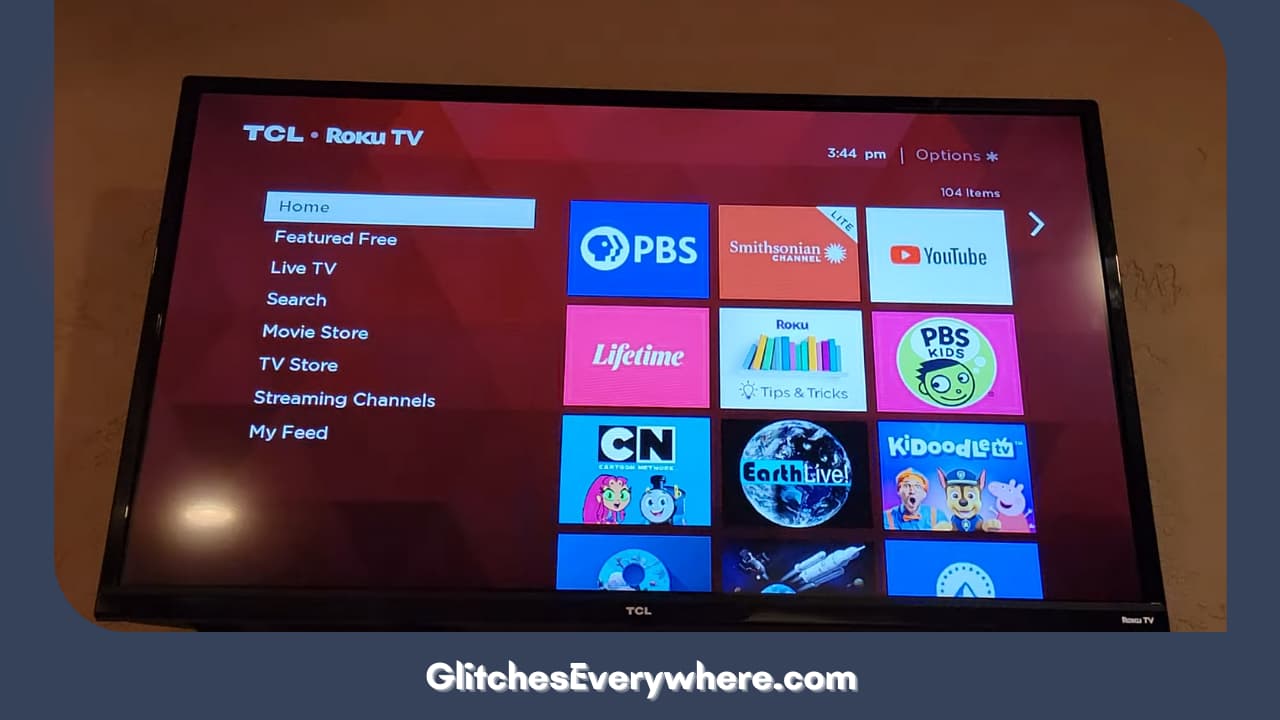
2. Navigate the screen to find and select the Live TV option.
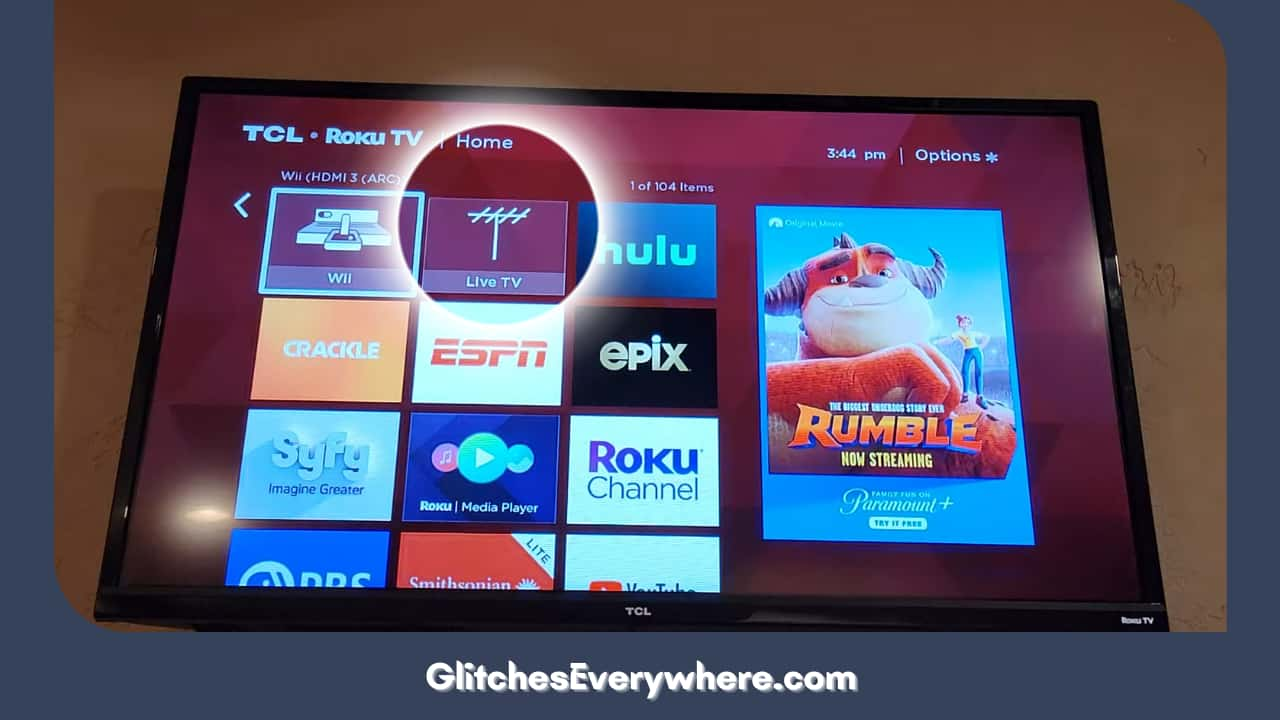
3. From here, go to Settings.
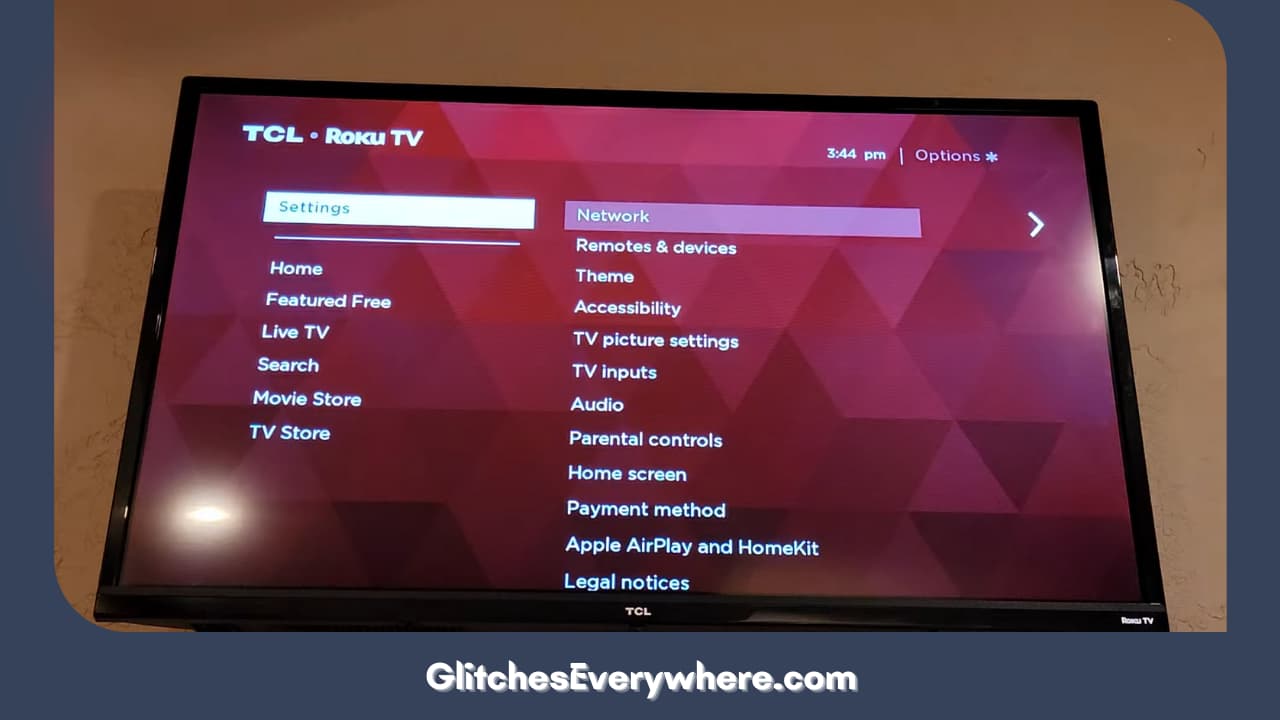
4. Then, move on to TV inputs.
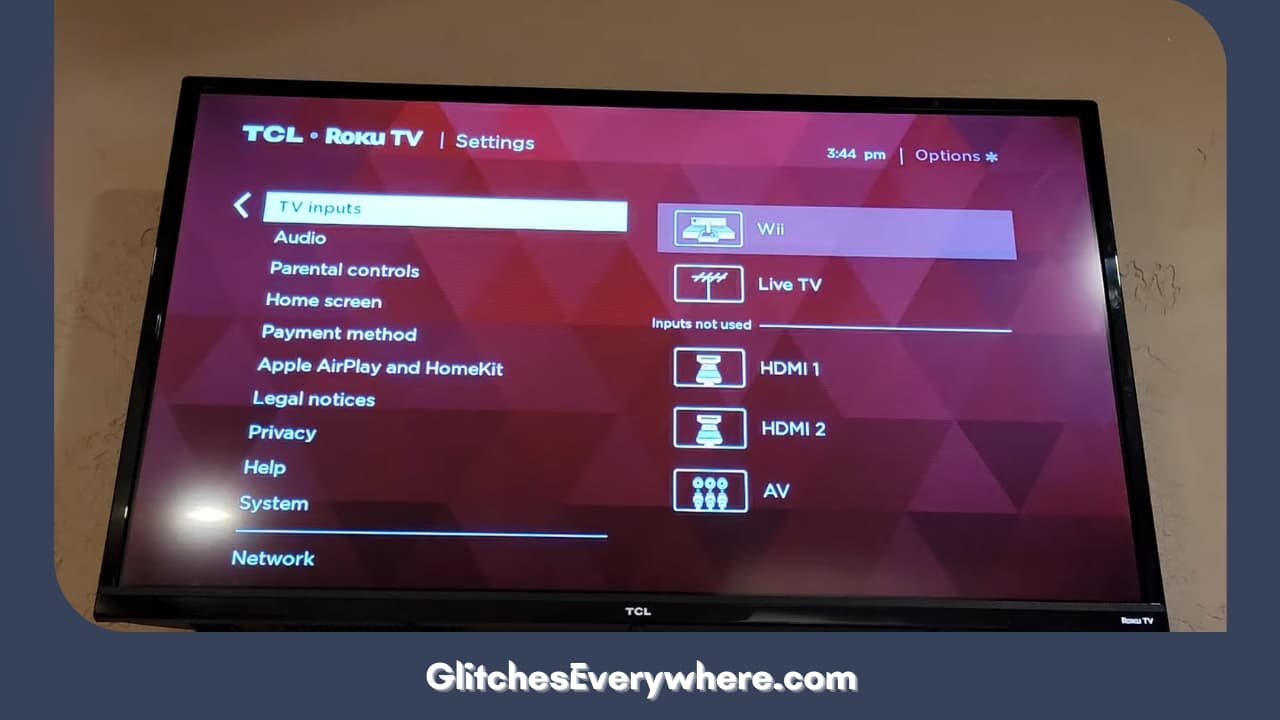
5. Move forward with Live TV.
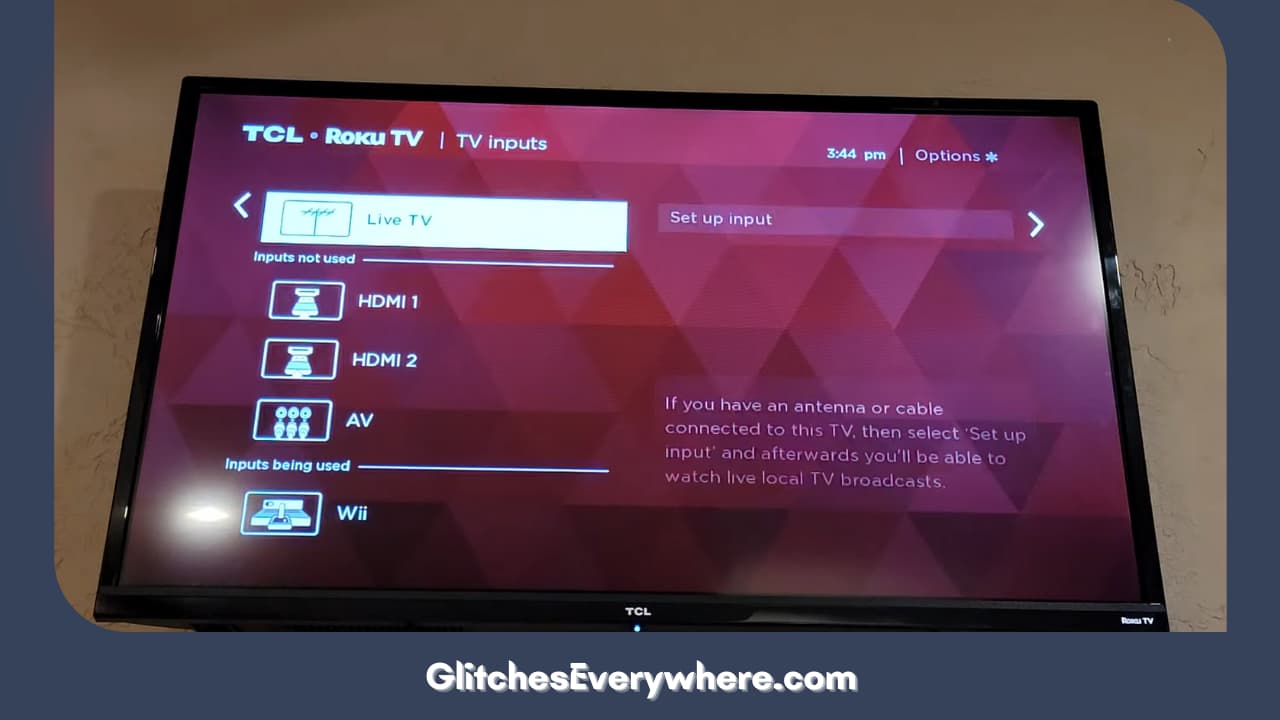
6. Finally, select the Setup Input options.
Post this step, you will be required to follow the basic prompts that show up on your screen.
By the end, you will have learnt how to change input on Roku TV.
Recommended Reading – Why is Roku Remote Volume Not Working: Fix in Seconds
How to Change Input on Roku TV Through Remote
Roku Input Fix 1
There is a college of ways that you can go about Roku inputs with respect to your remote. We have covered it both.
You are required to use it with HDMI CEC TV. That being said, in this case, where you are capable of this connection, there is nothing much to do. You can switch to the Roku input that is required by just pressing the Home button. Where is this Home button you might ask? Your Roku remote!
It should be noted that when you use your HDMI 1 port to access Roku, it makes a switch to HDMI 2 on its own. Remember that your Roku remote does not have a direct button to change HDMI input.
The next order of business is to check if your TV allows HDMI-CEC connections. Here is how you can do the same:
1. Press the Menu button.
2. Go to your Settings.

3. Find and enter the Input menu.

4. Further move on to System or System Options.
5. Here you’ll find your options. These should typically include CEC, HDMI or CEC HDMI.
Select and enable!
Roku Input Fix 2
Wondering how to switch input on Roku TV that doesn’t fit the above solution’s criteria? Do not worry and try this instead. Follow these steps:
1. Select the Home option.
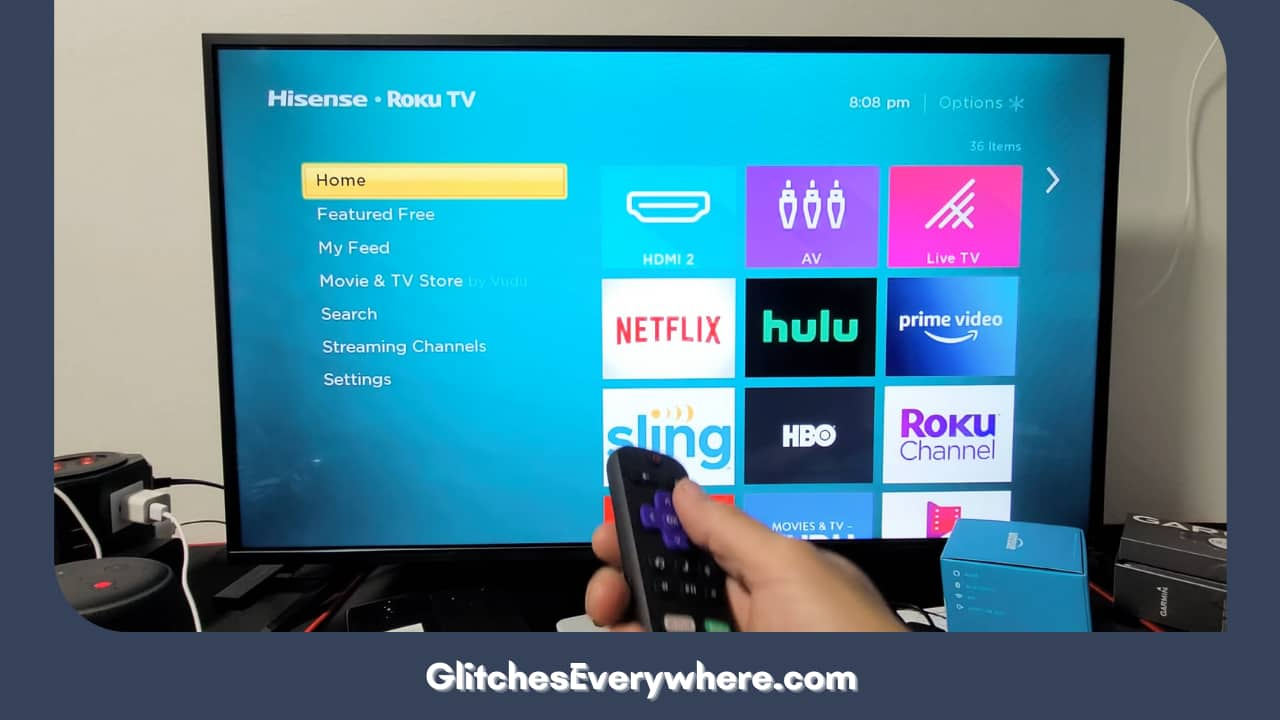
2. Find and enter Settings.
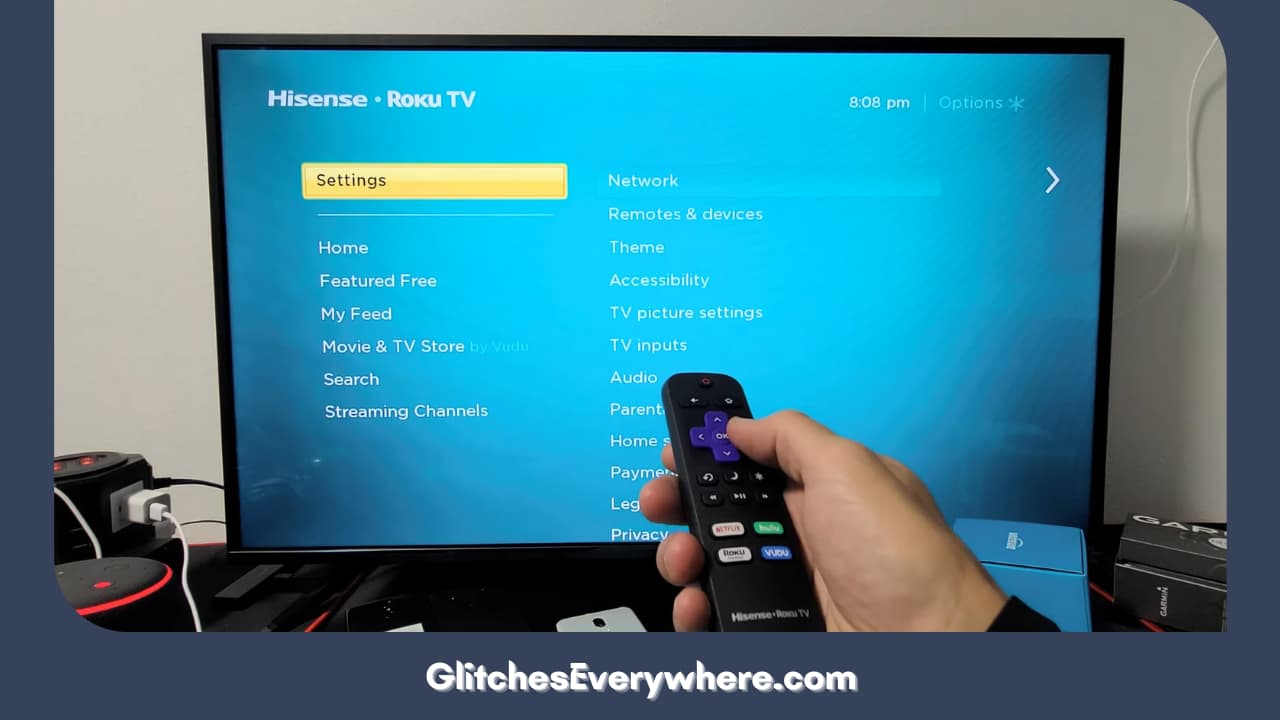
3. Find the TV inputs option and enter.
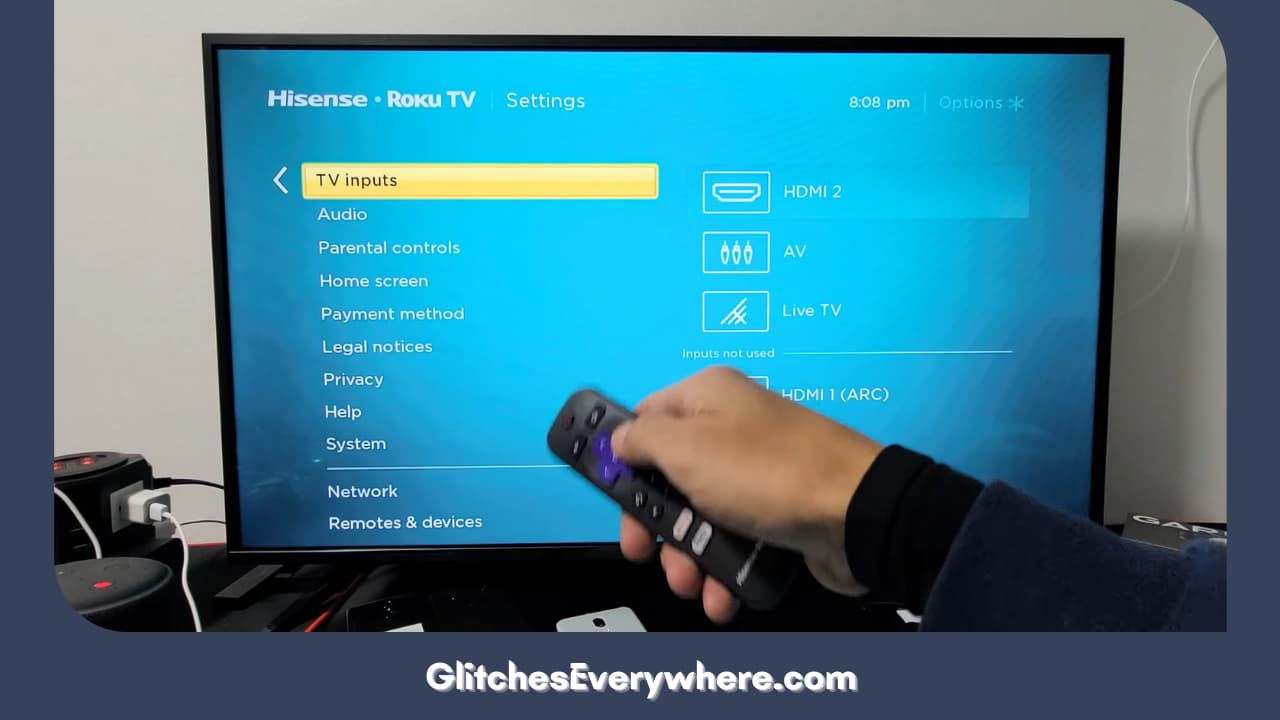
4. Select the Setup Input option on the particular Roku input you wish to choose.
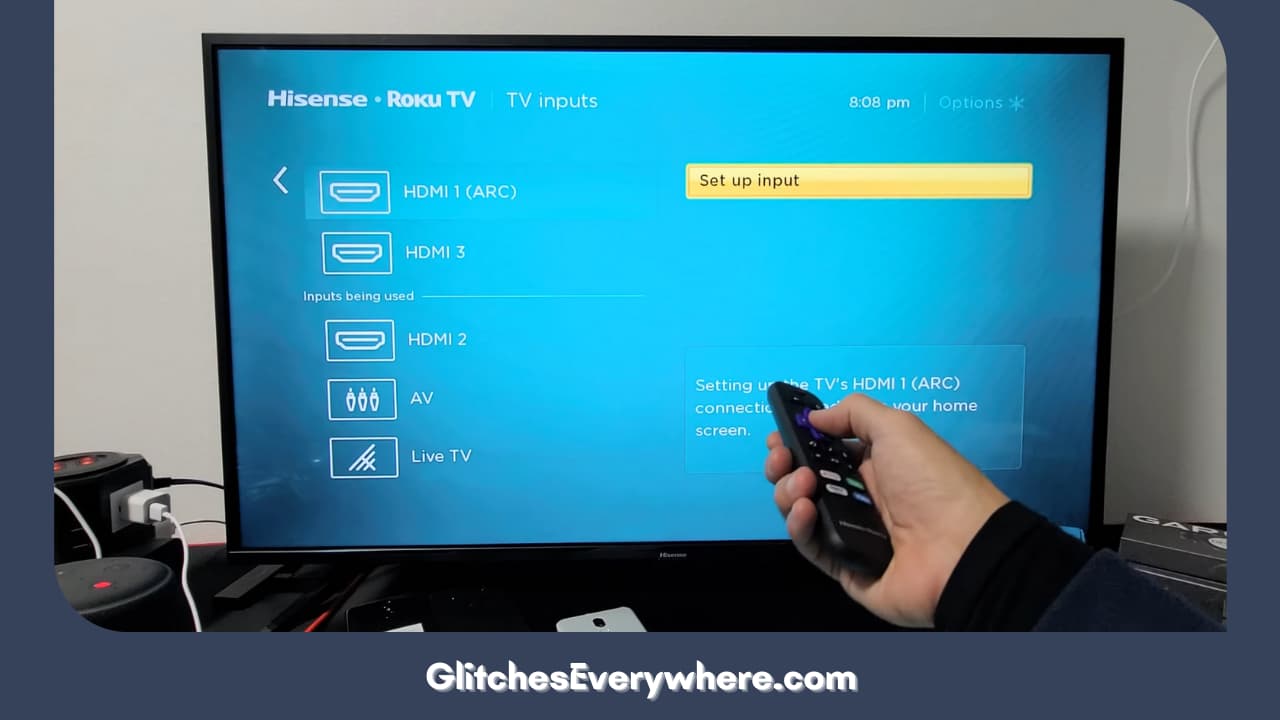
Bear in mind that this does not switch up your Roku inputs as it is. Instead, it adds the chosen Roku input as a title on the Home screen.
So, how to switch input on Roku TV after all? The main thing is done with the last step, now you just have to go to the Home screen and simply click on the title.
My tip to you would be to rename the Roku input you selected back there to the device that you are connecting it to. This avoids any further confusion.
Let’s quickly discuss how to rearrange your Home screen before we can go further with our change input on the Roku TV guide. Follow the given steps to do so in less than two minutes:
1. Go to Home through your remote.
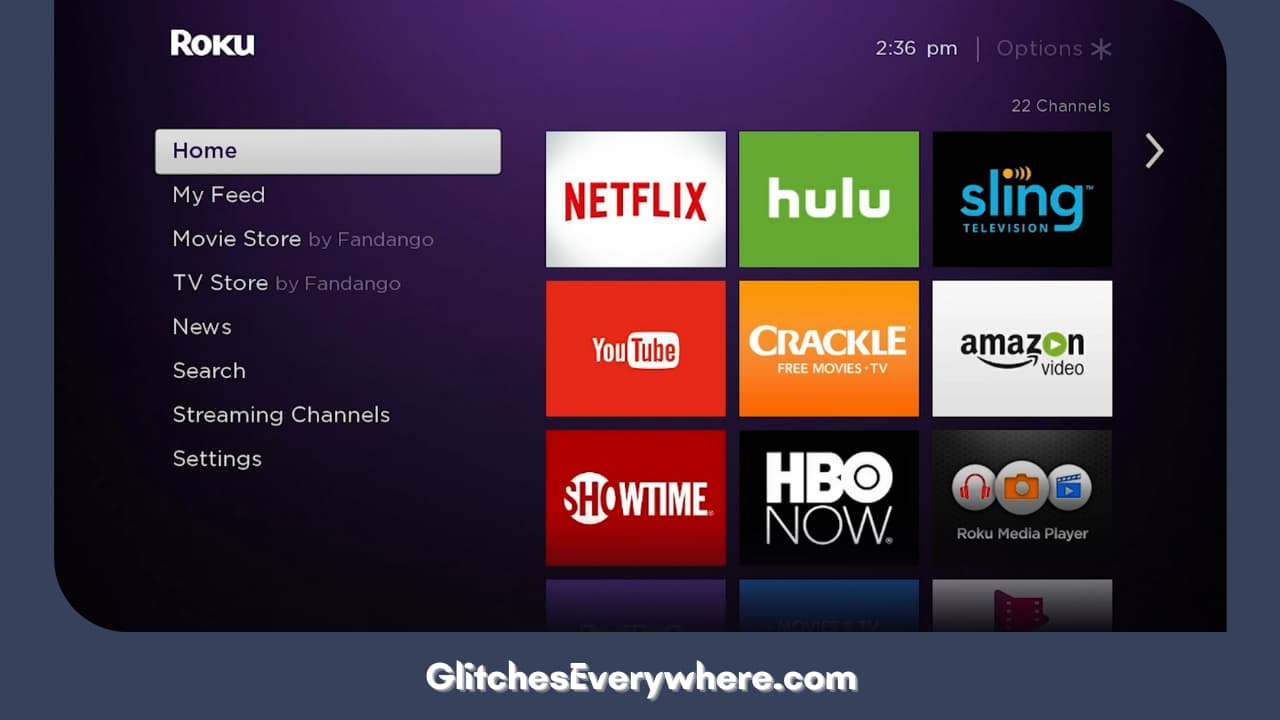
2. Move on to look through the screen and find the title you wish to move around.
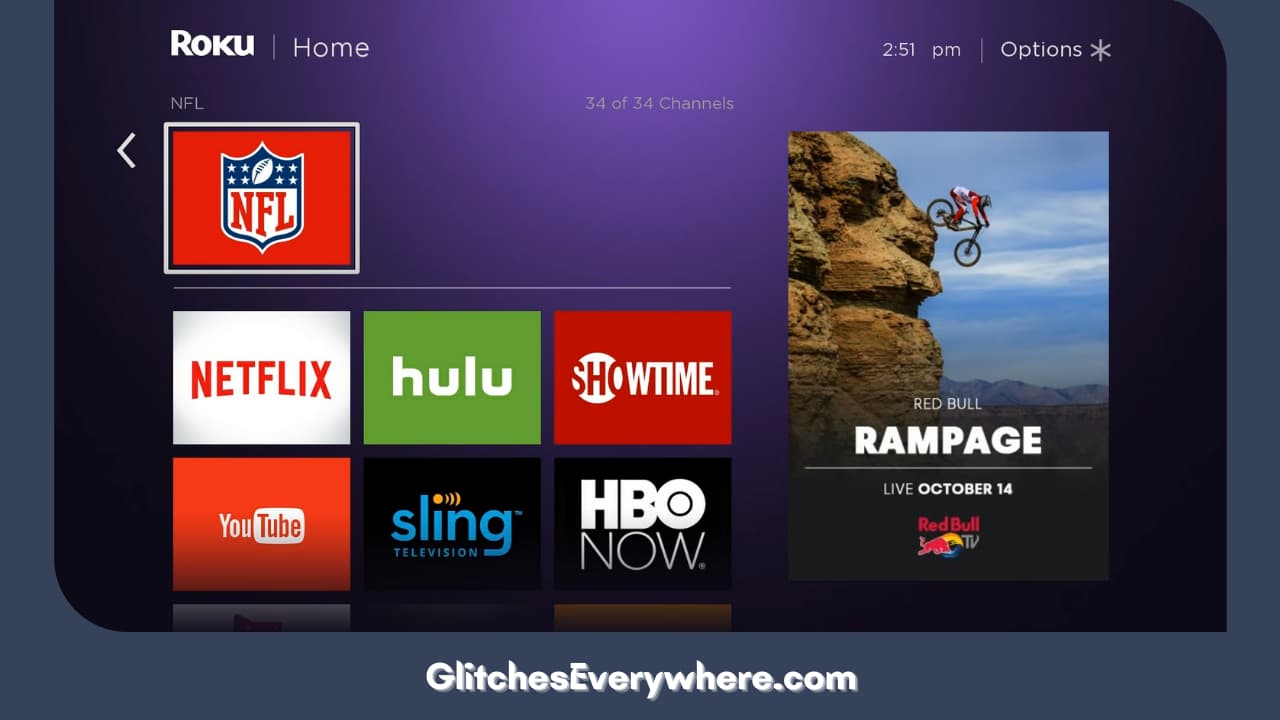
3. Once you land on it, press the asterisk button on your remote.
4. Then select the option MOVE CHANNEL.
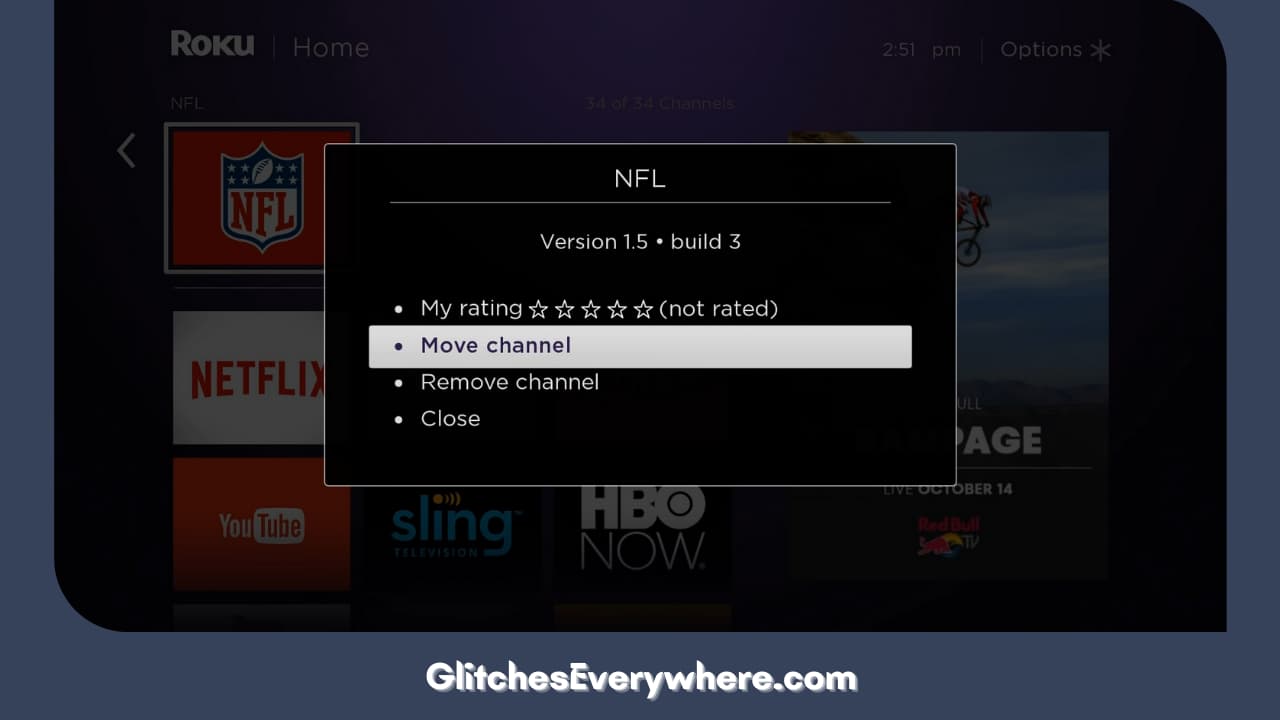
5. Using the arrow keys of your Roku remote, move the title around the screen easily.
6. Finally, press OK when you reach the place where you want the title to land.
So, rearrange your TV screen right now for the most convenient streaming experience!
Recommended Reading – Why is Airplay Not Working on Roku: Fix in Seconds
How to Change Inputs on Roku TV Through Buttons
You can change the input on Roku TV through this fun button hack. These buttons can help you out, but before we can look at the how, let us see the what.
Try to find these buttons in these four places as they may differ from model to model: first check the middle as well as the underside of the TV if you can’t check the right and left sides of the back. Still can’t find it? Check under the front left side of the TV. Look out for buttons in these same places when Roku keeps restarting.
Found your buttons? Now check the type of buttons you have discovered. In different Roku models, you’ll find variations of Power buttons, directional buttons or even both.
Once you have that done, follow the given prompts to change the input on Roku TV:
- Locate the main button and click on it. If you have one button, it’s easy, but if you have many, locate the one in the middle and press that one
- Once you do so, a menu will appear on your Roku screen’s left side.
- Now click the main or directional buttons to move down this menu, multiple times if necessary.
- Once you land on the Roku input you want, stop there and wait.
- After about two to five seconds, your device should change Roku inputs as instructed.
This should help you with your how to change input on Roku TV dilemma.
Recommended Reading – How to Sync Roku Remote without Pairing Button: FIXED
Change Roku TV Inputs: Streaming Device

When we talk about Roku, we must talk about their steaming devices. Let me expand. In many cases, you can use these Roku streaming devices into your TV’s HDMI and then use the offered smart features it may not already offer.
Since it is not inherently part of the television itself, switching Roku inputs become a little more limited but let’s still look at the options.
If your TV allows for an HDMI-CEC connection, switch Roku input by simply pressing the power button of your remote. Or else, you can turn the TV off with your remote to eliminate an unfavourable input choice that’s not your default.
Roku TV Input: Default
Even though you know how to change inputs on Roku TV, it can get tiresome if your device keeps opening up to the wrong Roku input source. This is exactly why I’ve added this section to this article.
The black screen with a no signal message is a sight to haunt, and it takes manual effort to change back to the correct Roku input source every single time. This is where the default setting comes into the picture. Resetting Roku without remote is also done by the same technique. Remember that this helpful feature is only available for Roku TVs alone, not with Roku streaming devices that you plug into your regular TV.
All that being said, this is how you can set up your default Roku input:
- Go to your Home screen.
- Find Settings and click on it.
- Move on to System.
- And then locate Power and select it.
- Go to the Power on option.
- Now, find and select the Roku input option you want to set as your default, automatically appearing whenever you switch on your device.
- Finally, save changes and exit the menu!
Roku HDMI Not Working
Now that we have discussed how to change HDMI on Roku TV let’s quickly look at what to do when the HDMI does not work.
Generally, it is the cable causing all the trouble. A work out or damaged cable and losing connection with the device itself generally provides for malfunctioning.
Use the following steps to double-check the issue:
- Unplug the HDMI cables, wait for a minute and then replug it.
- Check if the cords and cables are inserted in the right ports.
- Try resetting the TV, tuning the whole device off and then on again.
- If the cable is worn out, replace it altogether.
- Update the Roku software up to date.
How to Change Inputs on Roku TV: Without Remote
Wondering how to switch input on Roku TV if you do not have a remote? You have a couple more options when it comes to that.
The first option is to use the Roku app to do so. Here is how you can do it: Open Settings and make your way to Power Settings. Then find the Power On option and choose the required input option. After choosing so, simply press the Home button in order to save these new settings.
The other option is using screening mirroring for a similar effect. This totally depends upon the device you are using and its compatibility with your Roku device.
This brings us to the end of how to change input on Roku TV detailed guide. I hope it helped you understand the concept of Roku inputs in retail.
Wrapping Up
Don’t let your lack of information stump you or stop you from getting full use of your Roku device. Take this as a sign to be well-read about your devices.
Use this guide to understand Roku input in detail, what they are, their types and how to switch them with ease. Continue streaming your favourite TV shows and movies without any hassle!
Table of Contents

